
Pet Portrait Painting Process.... try saying that quickly!
Anyway - I really wanted to share a bit more about my process when it comes to painting pet portraits. It all starts with an e-mail - I love seeing the words 'pet portrait enquiry' appear in my inbox, then scrolling down to see the photos of the adorable pet I'm going to paint next!
Once I've had some correspondence with the client, and we've confirmed all the details (such as what size they'd like, and what date they need the piece for), I allocate a slot in my diary. When it's time to get started, I begin with doing a series of really rough, quick sketches on a big sheet of paper. This is why I ask for potential clients to send me a few photos (usually at least 5 but more is even better!). I like to draw each pet from different angles and positions, to get a good feel for their character and to start developing a likeness. No-one usually gets to see these sketches... sometimes they just look like very messy scribbles!

Next, I think about what the final piece should look like. If the client already has an idea of what they want, I'll just go ahead and sketch that out. If not, I'll decide what I think will work best, and create a sketch. This sketch is a bit more refined, and gives the client a feel for how the portrait will look. It's important to establish that they're happy at this stage before I go ahead with the finished piece. If they want to see another option, then I’ll create another sketch for them to see.

When the client has given me the go-ahead, I'll get started on the finished piece. Starting with another sketch (even more refined than the last one!), I'll make sure the positioning on the paper and all the proportions are looking about right. I try not to be too precious here as things can change once the paint is added. I go over the pencil lines with a putty rubber to lighten them, then I start painting.
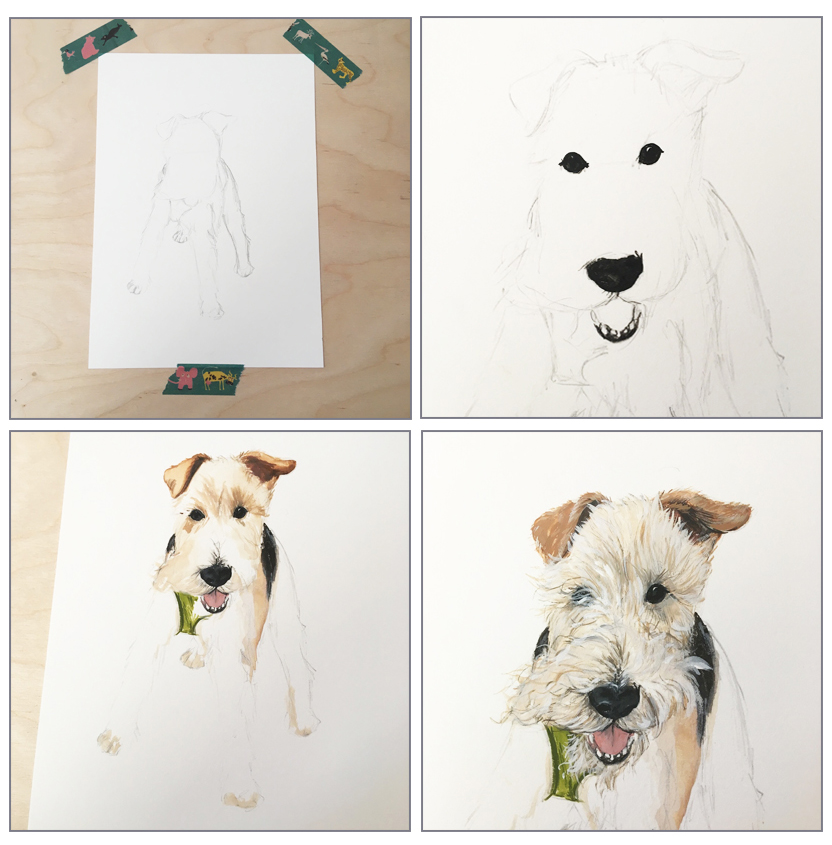
Eyes, nose and mouth come first. Then lots and lots of layers of paint! Basic colour and tone goes in first, then I build up detail and texture on top of that. I work in gouache paint, which is like watercolour but thicker and more opaque. It's wonderful for layering, and for using in either thick or thin consistencies. It's such a versatile paint, and my favourite thing to work with.

Fast forward a few hours of careful painting, and we have a finished piece! I photograph this and e-mail it to my client, and then wait nervously until I get a reply. Sometimes clients will want some details to be changed, and I'm always happy to do this. It's important for the client to just be honest and tell me if something's not looking quite right - I want to create something they are really happy with their input is always really helpful.
Once everything's looking good and both my client and I are happy with everything, I'll get the portrait wrapped up and ready to post to its new home. I like thinking about where my paintings will end up - they have been posted all over the world! This portrait was sent all the way to South Carolina, USA.

If you're interested in commissioning a pet portrait of your own, or if you have any questions, just send me an email - I'm always happy to help with any enquiries! You can also have a look at the pet portrait section on my website.